


前篇文章已經教學如何使用原生react native cli 來建立與開發APP專案,可是其中有些過程比較繁瑣,且還需要安裝Android Studio才能夠開發,本篇介紹一個工具 expo,此工具將這些繁瑣的事情給解決掉了,只需要安裝 expo-cli 以及在手機安裝 expo client就能夠快速上手。
官方網站 : https://expo.io/
原始碼 : https://github.com/expo/expo
首先安裝 node js
sudo apt-get install nodejs
安裝 expo cli
npm install -g expo-cli
使用expo初始化專案
expo init <project-name>
會先詢問要建立哪種專案,依照自己的需求選擇要的專案
? Choose a template: (Use arrow keys)
  ----- Managed workflow -----
❯ blank                 a minimal app as clean as an empty canvas
  blank (TypeScript)    same as blank but with TypeScript configuration
  tabs                  several example screens and tabs using react-navigation
  ----- Bare workflow -----
  minimal               bare and minimal, just the essentials to get you started
  minimal (TypeScript)  same as minimal but with TypeScript configuration
接著會詢問專案的名稱,輸入名稱Enter後會開始建立專案
? Please enter a few initial configuration values.
  Read more: https://docs.expo.io/versions/latest/workflow/configuration/ ‣ 50% completed
 {
   "expo": {
     "name": "<The name of your app visible on the home screen>",
     "slug": "MyProject"
   }
 }
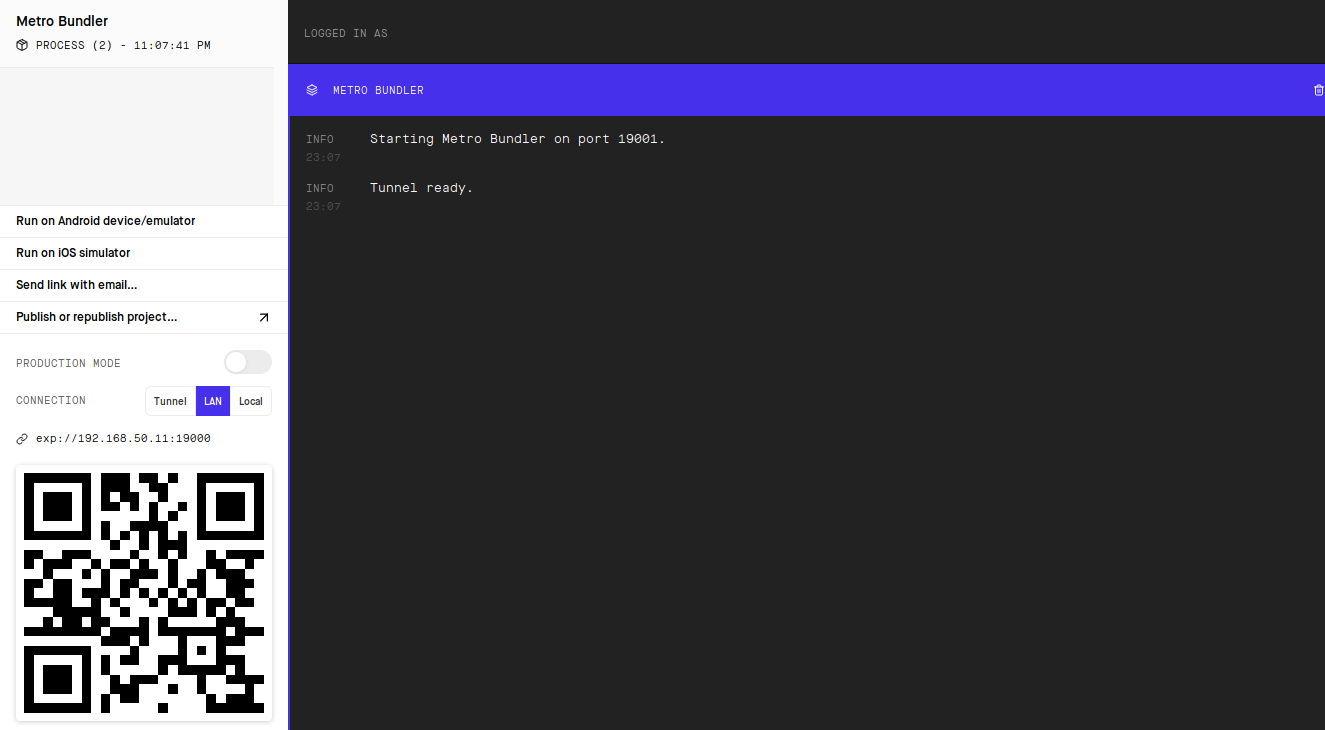
專案建立完到專案的根目錄輸入以下指令就會開始執行develop server,並且自動開啟網頁
npm start
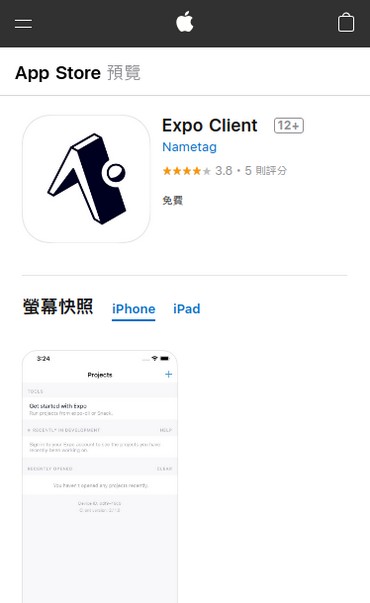
這時在手機上下載並安裝 Expo Cient 的 App
IOS版本:https://itunes.apple.com/app/apple-store/id982107779
Android版本:https://play.google.com/store/apps/details?id=host.exp.exponent

接著將手機網路後連線到與開發的電腦相同的區域網路中
開啟APP並且掃描網頁中的顯示的QR code

此時開發的專案原始碼有變動時,手機的APP就會重新build並且更新
並且debug的訊息也會直接顯示在剛剛的網頁中