


PHP是一個能快速開發的語言,而大部分的人都會使用apache當作PHP的伺服器,但是apache所需要的資源比較高,對於小網站來說租主機或VPS都是成本,nginx優點為所需要的資訊比較少,而且對於靜態檔案的吞吐速度非常快,本篇教學如何在ubuntu 安裝 LEMP (linux + nginx + mysql + php)環境。
本篇說明環境為ubuntu 20.04 LTS 並且預設裝起來的PHP是7.4
不同版本的ubuntu安裝方法大同小異
安裝Nginx
首先輸入指令update一下
sudo apt-get update
update完畢後輸入指令安裝nginx
sudo apt-get install nginx
此時輸入IP網址 如果顯示如下畫面就表示安裝完成
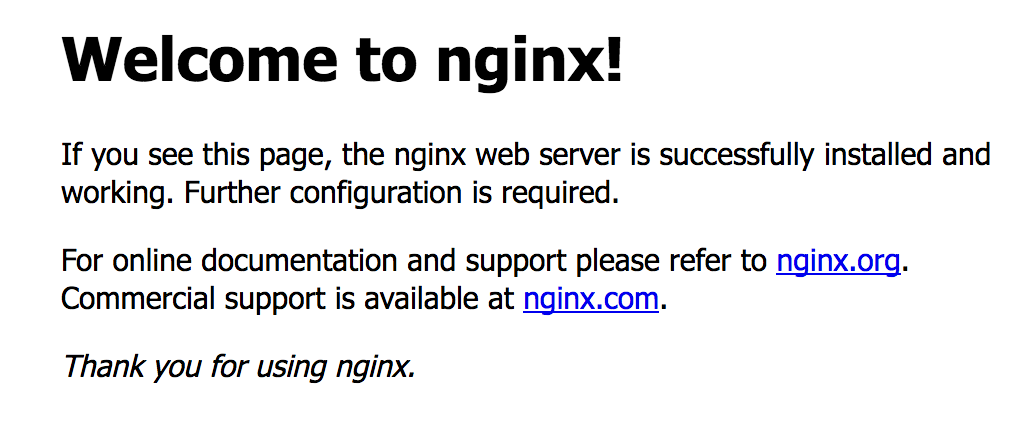
此時nginx便已經跑靜態網頁了 預設html檔案存放位置為/var/www/html
安裝MySQL Server
接著安裝mysql server伺服器 輸入指令:
sudo apt-get install mysql-server
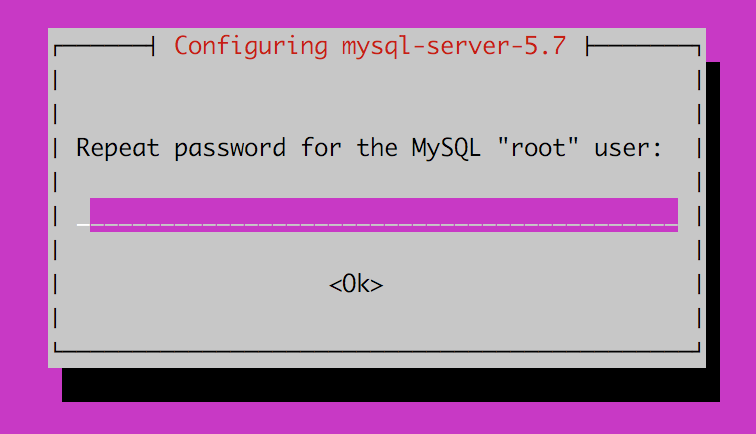
安裝到一半的時候會出現如下的畫面 表示要設定root帳號(管理員帳號)的密碼 設定自己想要的密碼

接著在輸入一次密碼
安裝完後輸入以下指令進行安全性設定
sudo mysql_secure_installation
之後會依序問以下幾個問題
VALIDATE PASSWORD PLUGIN can be used to test passwords
and improve security. It checks the strength of password
and allows the users to set only those passwords which are
secure enough. Would you like to setup VALIDATE PASSWORD plugin?

Press y|Y for Yes, any other key for No:
這在問是否需要安裝VALIDATE PASSWORD PLUGIN 其用途為當在修改密碼時會進行密碼檢測 當密碼強度不夠會無法設定完成 依照個人需求設定 輸入y|Y 表示是 輸入其他表示否
Change the password for root ? ((Press y|Y for Yes, any other key for No) :
此為詢問是否要改變root密碼
By default, a MySQL installation has an anonymous user,
allowing anyone to log into MySQL without having to have
a user account created for them. This is intended only for
testing, and to make the installation go a bit smoother.
You should remove them before moving into a production
environment.

Remove anonymous users? (Press y|Y for Yes, any other key for No) :
此問題為Mysql會預設建立匿名使用者,表示當使用command登入mysql的時候可以不需要填寫帳號密碼(用於test使用),是否要將匿名使用者刪除 (這邊建議回答Y)
Normally, root should only be allowed to connect from
'localhost'. This ensures that someone cannot guess at
the root password from the network.

Disallow root login remotely? (Press y|Y for Yes, any other key for No) :
這在詢問root帳號是否只能透過本機機器進行連線,或是可以其他IP連線,是否要禁止root可以透過遠端連線
這部份可以依據使用的情況去選擇,而如果是production環境建議回答Y來禁止別的IP連此root帳號
By default, MySQL comes with a database named 'test' that
anyone can access. This is also intended only for testing,
and should be removed before moving into a production
environment.

Remove test database and access to it? (Press y|Y for Yes, any other key for No) :
在預設時Mysql會建立一個database叫test,此資料庫所有帳號接可以存取使用它(用於測試目的),詢問是否要刪除這個test資料庫?
Reloading the privilege tables will ensure that all changes
made so far will take effect immediately.

Reload privilege tables now? (Press y|Y for Yes, any other key for No) :
問是否要重新載入privilege table,只有重新載入後剛剛的設定才會立即生效,否則要等到下次重新啟動Mysql資料庫
完成mysql安全設定
安裝PHP (PHP-fpm)
接著開始安裝PHP (因為還要讓php能夠連mysql所以也需要安裝php-mysql)
sudo apt-get install php-fpm php-mysql
當安裝完成後輸入以下指令修改一下PHP設定
sudo nano /etc/php/7.4/fpm/php.ini
找到其中一行:
;cgi.fix_pathinfo=1
將其改成
cgi.fix_pathinfo=0
設定完後儲存並輸入指令重新啟動PHP
sudo systemctl restart php7.4-fpm
然後要設定讓nginx能夠執行PHP腳本
輸入以下指令修改nginx設定
sudo nano /etc/nginx/sites-available/default
會到看原本設定如下 (不含註解)
server {
    listen 80 default_server;
    listen [::]:80 default_server;

    root /var/www/html;
    index index.html index.htm index.nginx-debian.html;

    server_name _;

    location / {
        try_files $uri $uri/ =404;
    }
}
我們將其改成如下 (紅色表示變動部分)
server {
    listen 80 default_server;
    listen [::]:80 default_server;

    root /var/www/html;
    index index.php index.html index.htm index.nginx-debian.html;

    server_name _;

    location / {
        try_files $uri $uri/ =404;
    }

    location ~ \.php$ {
        include snippets/fastcgi-php.conf;
        fastcgi_pass unix:/run/php/php7.4-fpm.sock;
    }

    location ~ /\.ht {
        deny all;
    }
}
修改完後儲存 並輸入以下指令檢查設定檔格式是否沒有錯誤
sudo nginx -t
如果顯示以下的文字就表示設定檔格式沒有錯誤
nginx: the configuration file /etc/nginx/nginx.conf syntax is ok
nginx: configuration file /etc/nginx/nginx.conf test is successful
檢查沒有錯誤就輸入指令重新載入nginx設定
sudo systemctl reload nginx
接下來測試php是否能正常執行
輸入指令產生info.php檔案
sudo nano /var/www/html/info.php
而檔案輸入
<?php
phpinfo();
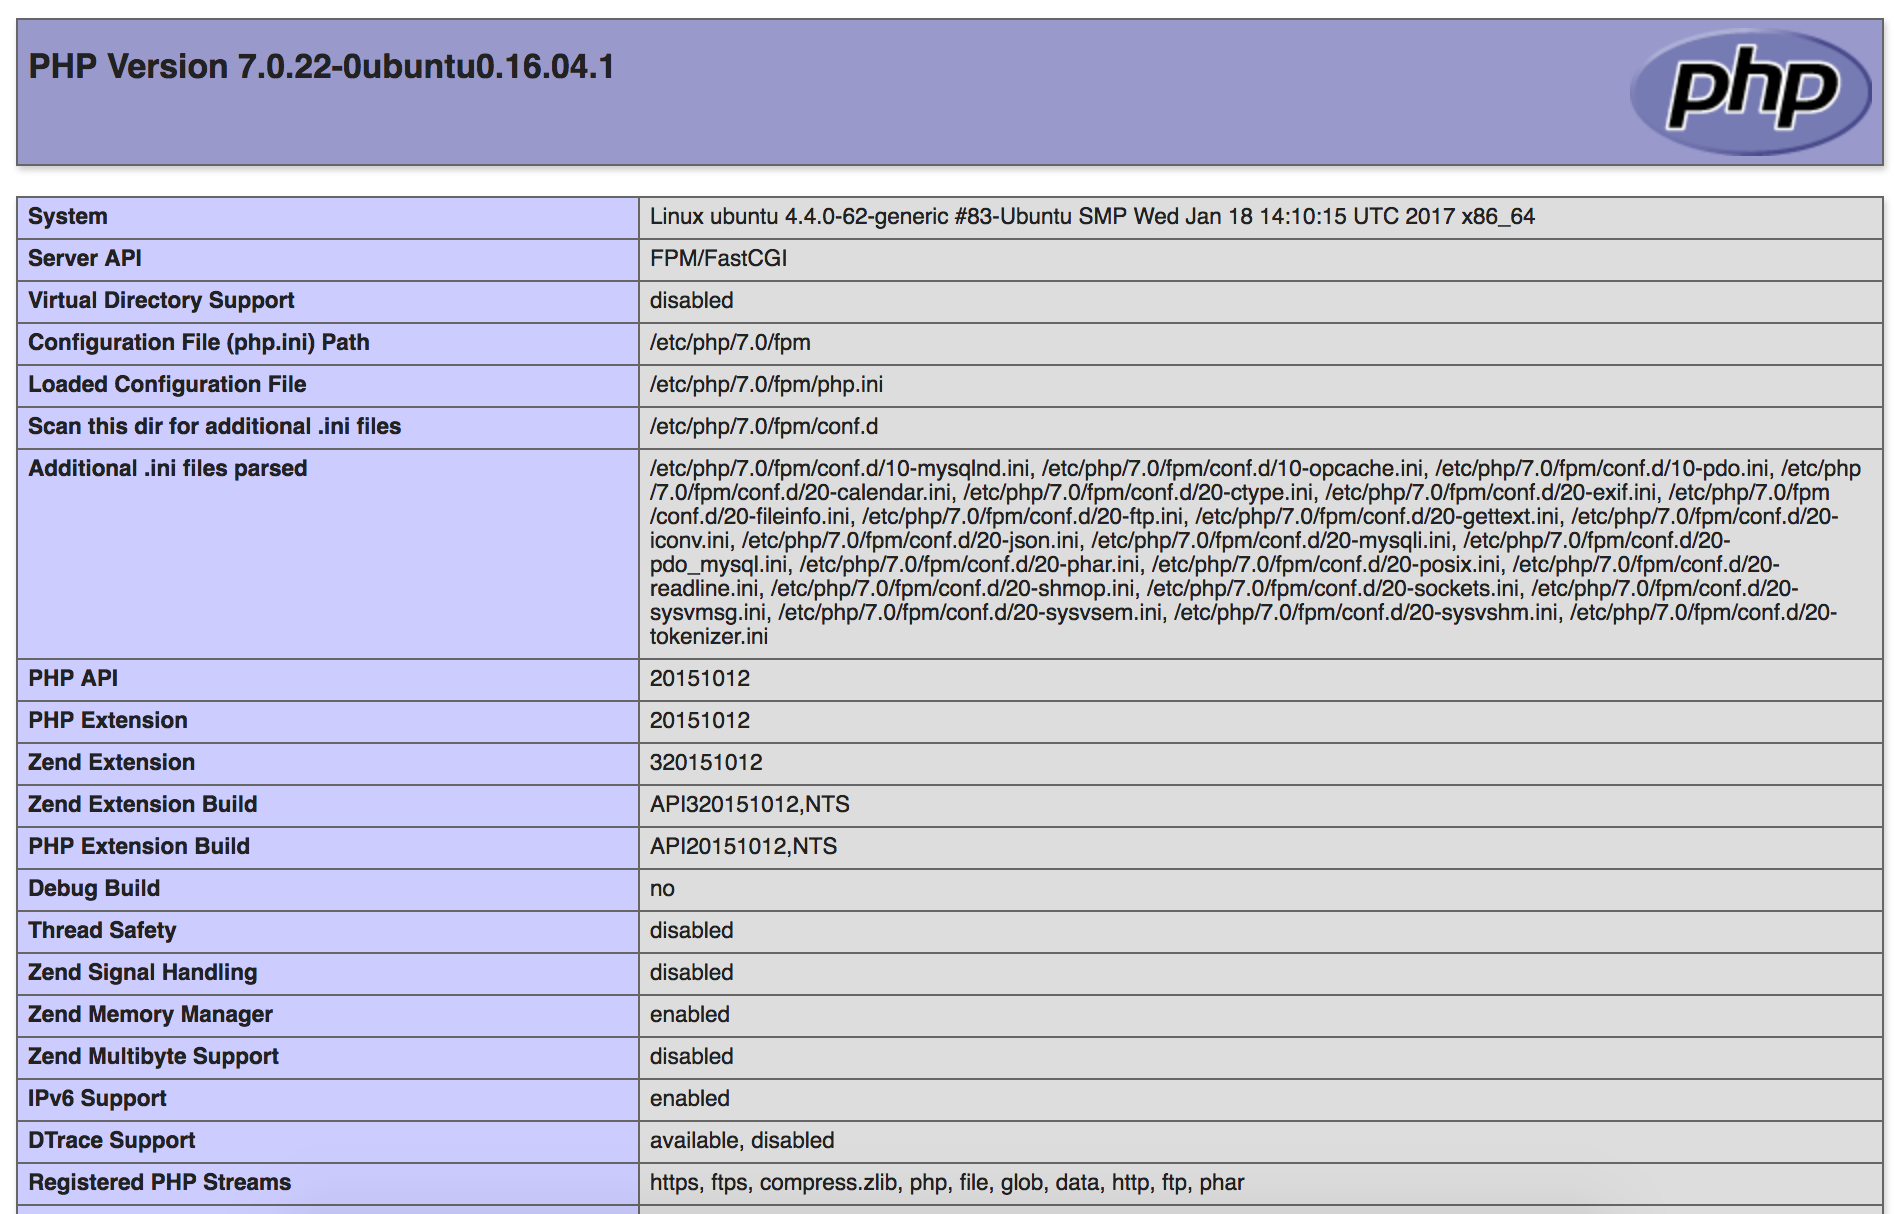
儲存後輸入http://hostname/info.php
如果網頁顯示如下的畫面便表示PHP能夠正常執行
接著把剛剛產生的php腳本刪除 輸入指令
sudo rm /var/www/html/info.php
完成LEMP安裝