


在開發 API 的時候, 往往會需要選擇一個合適的 API 框架, 在 NodeJS 常常看到的選擇可能會是輕量級框架 ExpressJS, 不過因為 ExpressJS 較輕量, 對於一些繁複的商業邏輯價就需要自己處理, 而這推薦一個精美且優雅 (隔離的、可測試的) API 框架 NestJS, 其直接內建 hot reload server 以及使用 typescript, 且文件非常完整, 在開發上做到開箱即用易上手的好處。
基本資訊
官方網站:https://nestjs.com/
原始碼:https://github.com/nestjs/nest
文件 (英文):https://docs.nestjs.com/
文件 (簡體中文):https://docs.nestjs.cn/
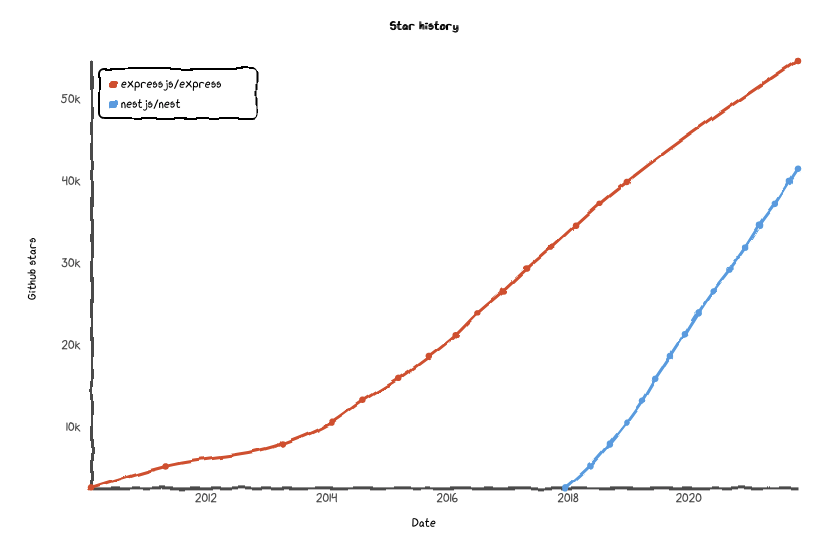
在 Github 星星數快速的成長, 下圖為 Express js 與 NestJS 星星數成長的比較
介紹
NestJS 是一個強大且功能完善的 API 框架, 除了擁有許多 API 常用的的功能以外, 還吸收了許多其他框架不錯的特性, 例如 DI (Dependency Injection), Service Provider, AOP (Aspect Oriented Programming), Decorator 表達式 (類似 Java Spring 的 annotation) … 等, 這些特性在不同程式語言中常常都會看到, 如果你剛好學過 Java 的 Spring Boot 那你可能在寫部分功能時會感覺自己是正在使用 Spring Boot, 這些特性非常適合中大型專案,可以增加程式的易維護性以及擴充性
以下為 NestJS 的優點:
- 功能性完整, 整合大部分後端需要使用到的功能
- 完整模組化, 有需要才進行安裝載入並可依照情境置換不同的實作, 專案可以輕量也可以組成大型架構
- 完善的使用
Typescript Decorator使程式碼更簡潔易讀 - 文件完整, 且支援多國語言, 對新手容易上手
- 使用 Typescript 增加可維護性
- 支援 IoC Container (Dependency Injection), AOP (Aspect-Oriented Programming)… 等不錯的框架特性
- 使用方式直覺, 擁有不錯的開發體驗
安裝與使用
要建立專案需要先安裝 Nest CLI, 輸入指令安裝:
npm i -g @nestjs/cli
當安裝完成後接著輸入指令建立專案:
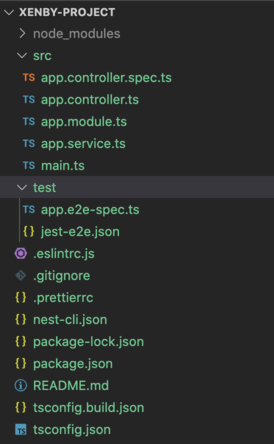
nest new xenby-project
建立出來的專案檔案數量不多, 只有 controller 與 service 一些範例程式碼與設定檔
這時在專案根目錄輸入指令啟動伺服器就可以開始開發了
npm run start:dev

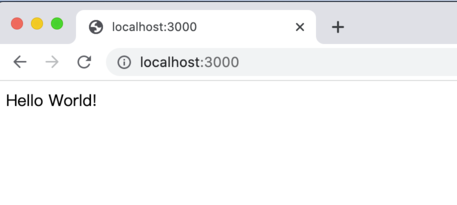
伺服器會啟動在 localhost:3000 中
基本功能介紹
因 NestJS 功能非常多, 無法全部講解, 這邊介紹基本的 API 三層式架構 (API, Service, Repository) 用法, 更深入的部分可以翻閱官方文件教學
Controller
寫 API 基本上少不了路由與 API Controller, 要讓 Nest 認定該 Class 是 Controller 方案是非常簡單, 只需要在 Class 上標記 @Controller() 並且在 method 上面標記 @Get, @POST… 等就能完成路由設定
// xenby.controller.ts
import { Controller, Get } from '@nestjs/common';
@Controller()
export class XenbyController {
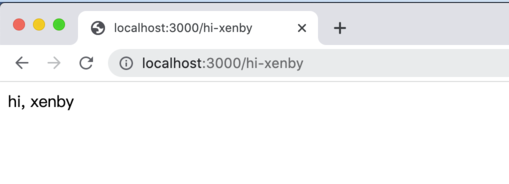
@Get('/hi-xenby')
getHi(): string {
return 'hi, xenby';
}
}
並且透過 app.module.ts 導入該 Controller 就能運作了
// app.module.ts
import { Module } from '@nestjs/common';
import { XenbyController } from './xenby.controller';

@Module({
  imports: [],
  controllers: [XenbyController],
  providers: [],
})
export class AppModule {}
Service
三層式架構中負責處理商業邏輯的部分為 Service 層, 而在中型以上的框架都會支援 Dependency Injection 方式 (例如:PHP 的 Laravel, Java 的 Spring Framework… 等), 達到控制反轉的目的, 在 Controller 不使用 New 的方式來建立 Service 而是透過注入的方式來使用, 使得 Controller 層使用時不需要了解 Service 內的相依性
要讓 Class 能夠注入其他模組只需要在 Service 上加上 @Injectable() 標記, 並且在 Module 上註冊此 Service 為 Provider
// xenby.service.ts
import { Injectable } from '@nestjs/common';

@Injectable()
export class XenbyService {
  getBlogUrl(): string {
    return 'https://xenby.com';
  }
}
// app.module.ts
import { Module } from '@nestjs/common';
import { XenbyController } from './xenby.controller';
import { XenbyService } from './xenby.service';

@Module({
  imports: [],
  controllers: [XenbyController],
  providers: [XenbyService],
})
export class AppModule {}
這樣就可以直接在 Controller 中注入使用了
// xenby.controller.ts
import { Controller, Get } from '@nestjs/common';
import { XenbyService } from './xenby.service';
@Controller()
export class XenbyController {
constructor(private readonly xenbyService: XenbyService) {}
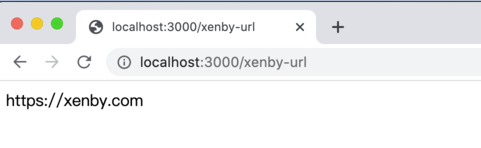
@Get('/xenby-url')
getUrl(): string {
return this.xenbyService.getBlogUrl();
}
}
Repository
NestJS 中並沒有自己實作 ORM 與 Repository, 而是整合進 typeorm 及 sequelize, 可以依據自己的使用習慣選擇想要的 ORM
這邊使用 typeorm 與 mysql 做範例, 首先要安裝 typeorm 與 mysql 套件:
npm install --save @nestjs/typeorm typeorm mysql2
並且在根目錄建立 ormconfig.json, 在裡面設定資料庫連線資訊
其中 entities 設定為 "dist/**/*.entity{.ts,.js}" 為讓 typeorm 能夠自動載入 entities
{
  "type": "mysql",
  "host": "localhost",
  "port": 3306,
  "username": "xenby",
  "password": "password",
  "database": "xenby-blog",
  "entities": ["dist/**/*.entity{.ts,.js}"],
  "synchronize": true
}
接著只要在 app.module.ts 引入 TypeOrmModule 就會自動配置連線
// app.module.ts
import { Module } from '@nestjs/common';
import { XenbyController } from './xenby.controller';
import { XenbyService } from './xenby.service';
import { TypeOrmModule } from '@nestjs/typeorm';

@Module({
  imports: [TypeOrmModule.forRoot()],
  controllers: [XenbyController],
  providers: [XenbyService],
})
export class AppModule {}
這時候就可以開始用建立 Entity 與 Repository
※ 詳細 typeorm 用法可以參考官方文件:https://typeorm.io/
// post.entity.ts
import { Entity, Column, PrimaryGeneratedColumn } from 'typeorm';

@Entity()
export class Post {
  @PrimaryGeneratedColumn()
  id: number;

  @Column()
  title: string;

  @Column()
  content: string;

  @Column({ default: true })
  isActive: boolean;
}
// post.repository.ts
import { EntityRepository, Repository } from 'typeorm';
import { Post } from './post.entity';

@EntityRepository(Post)
export class PostRepository extends Repository<Post> {
  async findById(id: number): Promise<Post> {
    return await this.findOne({ id });
  }
}
並且在 Module 中將 Repository 註冊為 Provider
// app.module.ts
import { Module } from '@nestjs/common';
import { XenbyController } from './xenby.controller';
import { XenbyService } from './xenby.service';
import { TypeOrmModule } from '@nestjs/typeorm';
import { PostRepository } from './post.repository';

@Module({
  imports: [TypeOrmModule.forRoot()],
  controllers: [XenbyController],
  providers: [XenbyService, PostRepository],
})
export class AppModule {}
這樣就能夠在 Service 層注入 Repository 使用了
// xenby.service.ts
import { Injectable } from '@nestjs/common';
import { PostRepository } from './post.repository';

@Injectable()
export class XenbyService {
  constructor(private postRepository: PostRepository) {}

  async getPostContent(id: number): Promise<string> {
    const post = await this.postRepository.findById(id);
    return post.content;
  }
}
結語
這邊介紹只有 Demo NestJS 中冰山一角的功能, 其他功能還包括 Middleware, Validation, Pipes, Guards, Exception filters… 等許多的功能, 如果對於其他功能有興趣可以去翻閱一下官方文件,相信對於專案開發會有很大的幫助。